My first cross stitch project
/My interest in learning cross stitch stemmed from a total accident and confusion with needlepoint and cross stitching. I’d always assumed the two were the same thing, and therefore interchangeable. That’s not the case, and so as a result after buying what I thought were needlepoint kits at Hobby Lobby, I spent the first half hour of my project Googling “what’s the difference between cross and needlepoint?” only to find out I was not, in fact, doing a needlepoint project. And frankly, I still can’t totally say what that difference is. When you’re a beginner at anything, you’re already flooded with dozens of new terms that will eventually become vernacular, so my ability to really grasp the difference between the two was—and still is—limited, to say the least. So far, it seems like both are under the embroidery family, but needlepoint follows a paint-by-numbers approach and has many stitch types, whereas cross stitch is more free form/counted, but also refers to a way to stitch, and you only follow one stitch type. I think? Get back to me if you know a better way to explain it.
As it turns out cross stitch is the more complicated of the two, and I still want to try my hand at needlepoint. It’s funny how I fell into cross stitch thinking I was doing needlepoint, but I actually enjoy the flexibility and freedom cross stitch offers! I want to make stockings next year based on the Hunt and Hope ones I saw on Julia Berozlheimer’s account, which is what pushed me over the edge to buy a kit. I’d been seeing Carly needlepoint for a while and that was already getting the wheels turning and inspiring me! I believe the Hunt and Hope stockings are actually needlepoint, so I will still need to give that a try, figure out the freaking difference between that and cross stitch, and then take on the monstrous task of designing them. In my head, it’s a Christmas 2022 goal for me and Diego, but that may be really pushing it.
My first project
For my first cross stitch projects, I bought two kits. One is an American flag ornament, which I got as a gift to make for my father in-law. The other is more “me” but also not so beautiful that I’d be sad if I messed it up. Basically cute enough to not be an eye sore but not so pretty I’d feel discouraged. Both are objectively low quality, but I felt it wasn’t worth dropping cash just yet before I was certain I enjoyed the hobby.
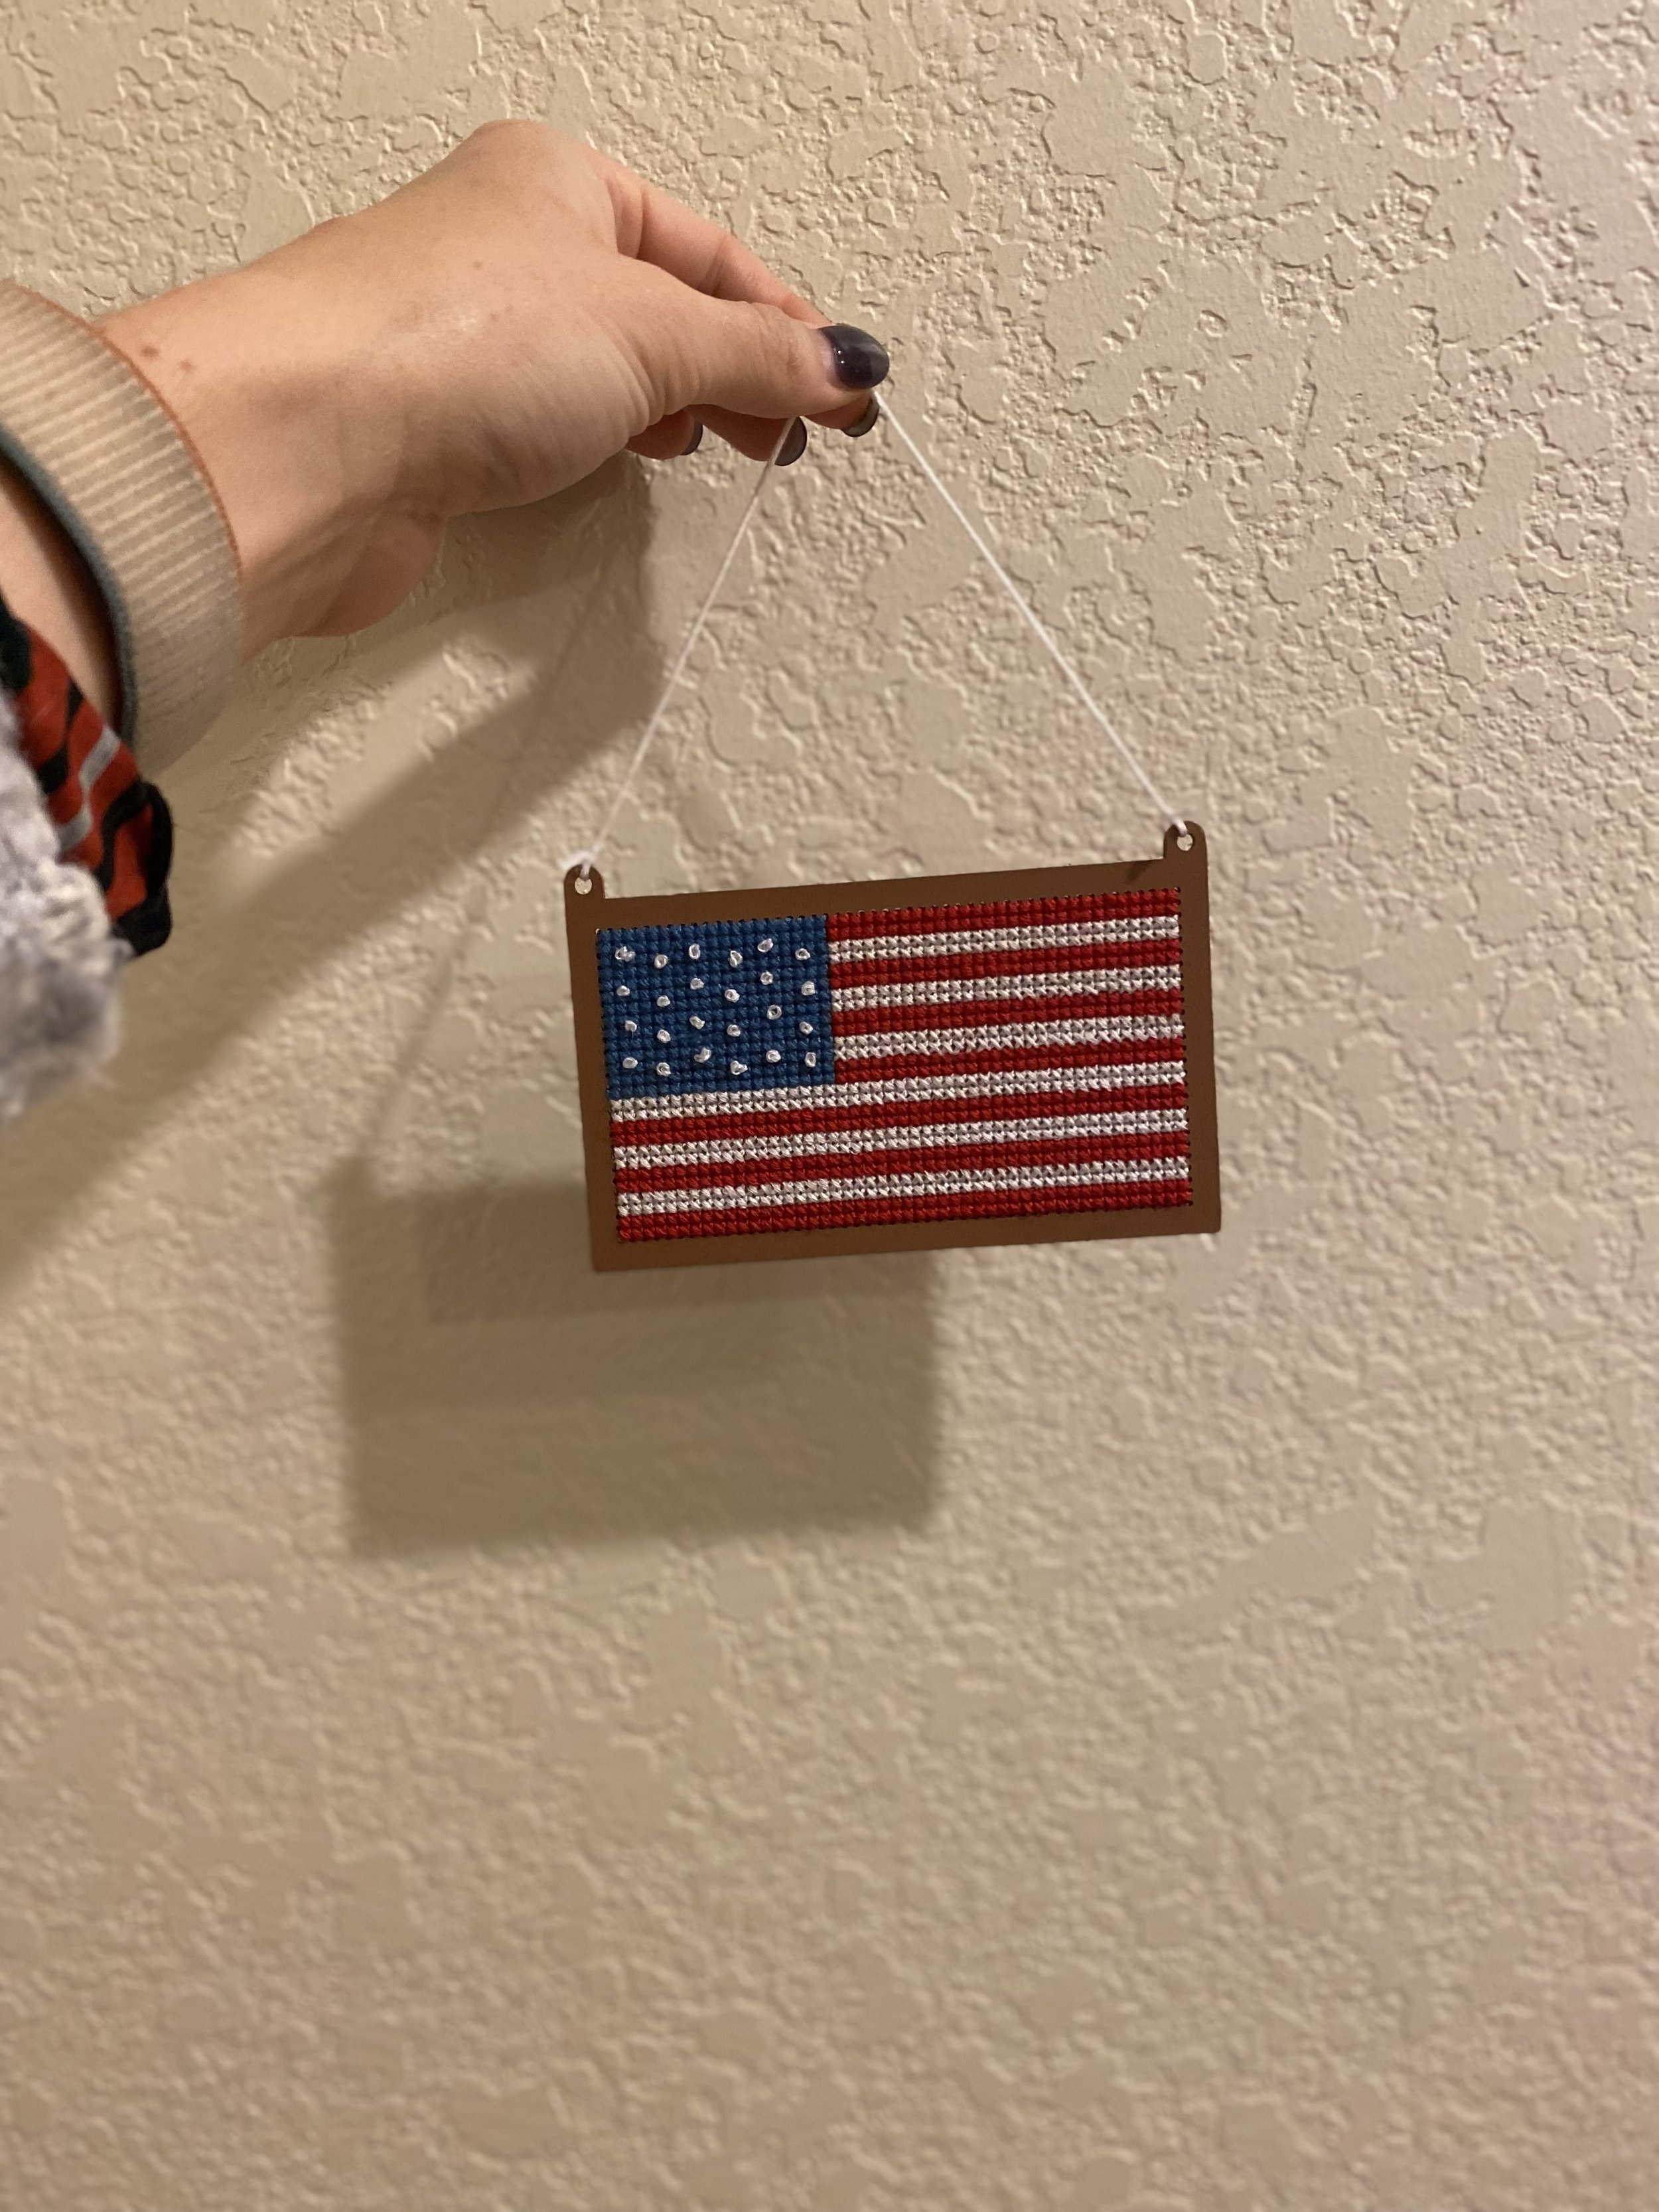
I started with the American flag ornament and I was glad I did! I have a lot to learn, and the pattern is really straightforward and done on a wooden ornament, not Aida, so I didn’t need to really count a ton minus the blue square width/height.
The first thing I learned—frustratingly—was that cross stitch uses “floss” and you have to separate it yourself. This was honestly enough to make me give up at first. Once I figured out that the thread in my kit was not just one long string but six all wrapped together, I couldn’t understand why on earth anyone would ever bother buying thread this way. What a hassle!
I went at separating the floss like a total dope and just yanked at it. I didn’t even cut a small section to work off! (I learned via frustration to snip the thread when it’s about the distance between your arm to your shoulder). As a result I created so many knots in my floss I almost screamed. Had it not been for my experience untangling jewelry I likely would have stopped right there.
After the first debacle, I watched a few videos and realized how totally simple it is to separate floss and that I need to chill and follow videos more! And how needlessly I’d given myself trouble. Here’s how I’d explain it to me a week ago:
How to separate embroidery floss for cross stitch
Snip a small portion of the embroidery floss to work with (about the distance from your arm to your shoulder).
Hold all the floss in-between your non-dominant fingers.
Separate out one string of floss, and with your dominant hand pull straight up. Don’t let go of the floss in your non-dominant hand. Eventually you’ll have a piece of floss. Do this with the rest until they’re all separated.
I saw some debate online about separating in bunches, or one-by-one. I found as a beginner I was less likely to have knots in my floss if I did it one-by-one, and some people said it makes the design look more filled in when they’re all separated individually, than in groups of two or three anyway. (My wooden ornament called for three strands of floss.)
After what was initially super frustrating, I now totally realize that separating the floss allows you to adjust the thickness of the design, but after spending about two hours untangling my first sections I wasn’t ready to appreciate this information.
Starting and ending thread
After I overcame separating the floss, getting started was actually fairly easy. I watched a few quick videos to double-check check I was doing it all correctly, then it was relatively straightforward from there. The instructions in my kit were okay for getting started, and I would definitely not rely on them if I were to buy this kit (though I also wouldn’t recommend this kit.) As it turned out, my second kit even had incorrect pattern information that I only caught by comparing it to the photo, so I would suggest buying something better online and skip Hobby Lobby unless you’re feeling spontaneous.
To get started, I used the “Danish method,” both to start my stitching and also to do the full row of blue. I didn’t know this is what it was called until I watched the Cross Stitch University series, which later convinced me to use a loop knot, which I definitely prefer!
As for ending, I started to weave the thread back through the project like most guides recommend, but the wooden ornament was so sturdy that I really couldn’t, so I found it easier to leave a tail for the end, and then just stitch over it like I did when I was starting a new thread. Not ideal, but it worked. With Aida cloth, weaving the end in is way easier.

Knots in work
Embroidery floss gets tangled. I knew this when actually preparing the thread, but it also gets tangled while you work and then you have no idea how? Cutting the floss shorter helps a ton, but sometimes it would get so knotted up I had to just cut it and start over. I could feel myself getting so angry with these knots, so it forced me to be slow and more careful, and by the second project I think I only had one or two knots happen and I was able to quickly fix them. Sometimes though, they are just such tiny knots it’s better for your head and heart to start over. Trust me.
Traveling
I’m not sure if “traveling” is the legit term for what I am about to describe, but in this case it refers to when you need to move from one stitch to another that is not adjacent to your current one. This is a fairly simple thing to do, but online I think people complicate it for the sake of having a pretty “back” of your cross stitch. Maybe one day I will boast about a nice looking back of my cross stitch, but for now I really am fine if the back looks janky, so long as the front looks good. I think you really need to only fret about this if you’re using a dark thread on a light cloth.
Anyway, it turns out that “traveling”—moving over a few spaces in the cloth—is as simple as moving your needle. That’s it. It’s fairly straightforward, but I found that no one really covered this well or answered my question, so I just did it. If you have to move far across the project, it’s best to start a new thread, or if it’s not as far you can weave/sew it through some stitches on the back.
Broken needles
I had no idea needles could break, but I snapped about four in my first project. I think this was because I was cross stitching a wooden ornament with three threads instead of two threads in an Aida cloth. Cross stitch is traditionally done with two threads and on cloth, so it’s less work on the needle. I am also willing to bet that the needles that came with either kit weren’t very good quality, so I actually did some research and ordered from a few brands online! I haven’t tried them yet, but already in the crafting community I see a lot of people refer to Clover and Bohin, so I can only assume they’ll be good. I’m not sure if I should expect other needles to break, but these needles broke often when I felt like they were getting pretty dull.
Terms I learned
It’s amazing how much work it is to learn so many new terms for a hobby, but also how quickly you’re suddenly speaking this new “language.” These aren’t perfect definitions, but as a novice this is how I define them in my head!
Floss - This is the embroidery thread, and usually comes with six strands of floss. You typically separate it into two strands for cross stitch.
Aida cloth - This is the cloth specific to cross stitch and it has a huge “grid” on it. This is how you can count your patterns.
Embroidery hoop - This holds tension on the project and keeps stitches even. You can also use Q-snaps, which I want to try.
Needle minder - This is a useful, (and often cute) magnetic piece that you can place your needle on when you pause your work.
French knot - I’m not sure how to define it, but I still hate these. They basically are cute little dots/puffs on the pattern. Cross Stitch University helped me improve mine, but they frustrate me because if you mess them up you have to cut them. You can’t really unknot them.
Loop method - I learned this for my second project, and it can only be used with even numbers of threads. I love this method because it keeps the stitches tight without having to deal with stitching over the tail.
There are definitely other terms out there, but these are what I see most online and what I understand. Now that I’ve done two projects and have more kit to try, I feel ready to buy a pattern online and shop for my own DMC threads!
What I bought and recommend
As is obvious by the title of this post and the nature of this blog, I am not an expert. But I am a beginner, so I can think of what really helped me as one!
Tools
Cross stitch kit - I recommend starting with a simple pattern and using a kit so you don’t need to fret about sourcing everything. I liked the ornament I started with because I didn’t need to learn how to count from the middle in Aida cloth, but I also felt like the ornament was really tough on my needle. Like I said earlier, I wouldn’t recommend getting one from Hobby Lobby. I would go to Etsy or Lovecrafts for beginner kits instead, and in general I’d look for a simple pattern with only a few colors to start!
Needle minder - While I have been hating on Hobby Lobby, I got a super cute needle minder from there! I highly recommend this because if you are stitching in bed, you may lose your needle easily. I just attach this to my canvas as I work! There are a ton on Etsy.
Needle storage - I also got this from Hobby Lobby. It has a magnetic bottom and is good for now, but I may need something better for when I have different needle sizes.
Embroidery scissors - Carly recommended these on her blog, and I ordered them as well. They safely got through airport security twice!
Extra needles - Most kits come with needles, but like I said I bought a few extra. I bought these Clover and Bodin ones.
Resources
Cross Stitch University - Learn How to Cross Stitch for Beginners with Kimberly - I mentioned it a few times, but I really wish I’d just watched all of this first and maybe even done the same project with Kimberly. I don’t love the design, but Kimberly is an excellent instructor. Start here!